Blog 18
Unsure How to Prep Your Walls for Paint? Here's What You Need to Know
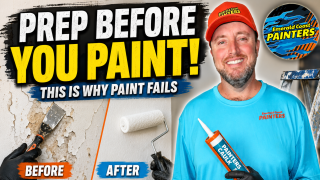
Most homeowners focus on picking the perfect color. The prep work? That part gets skipped, rushed, or just forgotten. But here's the truth: how your walls are prepared before a single drop of paint is applied determines almost everything about how the finished job looks and how long it lasts.
If you've ever seen paint peel, bubble, crack, or look uneven just a year or two after painting, poor prep is almost always the reason. This is especially true along Florida's Gulf Coast, where humidity, salt air, and intense heat put your paint through a lot.
Whether you're getting ready for a DIY project or thinking about hiring a house painter in Inlet Beach, FL or the surrounding areas, this guide walks you through every step of proper wall preparation. We'll cover what professional painters do, why each step matters, and what you should realistically expect before the painting begins.
---
Why Wall Prep Matters More Than the Paint Itself
It might sound dramatic, but even the most expensive paint on the market will fail if it's applied to poorly prepared surfaces. Paint needs something to bond to. When walls are dirty, cracked, glossy, or damp, that bond never fully forms.
In coastal communities like Destin, Navarre, Fort Walton Beach, and along the 30A corridor, this problem is amplified. Salt air accelerates rust stains, mold, and paint breakdown. Humidity can cause moisture to sit inside your walls. If a painter skips prep in these environments, you're looking at problems within a season or two.
Good prep protects your investment. A properly prepared surface means your paint job could last 8 to 12 years on the exterior and 5 to 10 years on interior walls. Cut corners on prep and you might be repainting in two to three years.
---
Step-by-Step Wall Prep: What Professionals Actually Do
Step 1: Inspection and Assessment
Before anything else, a professional painter walks the space carefully. They're looking for water damage, mold or mildew, cracks, holes, peeling paint, efflorescence on masonry, and any surface that's too glossy for new paint to stick.
This inspection shapes everything that comes next. A house painter in Inlet Beach, FL or across the Emerald Coast knows that older homes near the water often have hidden moisture damage or multiple layers of old paint that need to be addressed.
If you're doing this yourself, take your time with this step. Grab a flashlight and look at your walls at an angle. Imperfections show up much more clearly in raking light than under standard overhead lighting.
Step 2: Cleaning the Surface
You cannot paint over a dirty wall and expect it to hold. Grease, dust, grime, smoke residue, and especially salt buildup on exterior surfaces will prevent proper adhesion.
For interior walls, a solution of warm water and a small amount of dish soap works well for general cleaning. For areas with grease (like kitchens), a degreaser is more effective. Wipe everything down, then let the walls dry completely before moving forward.
For exterior surfaces in Destin, Fort Walton Beach, or anywhere along 30A, pressure washing is standard practice. A thorough pressure wash removes built-up salt, mold, mildew, algae, and chalky residue from old paint. At Emerald Coast Painters, we include this step as part of our exterior painting process because it's non-negotiable on the Gulf Coast.
Let the surface dry for at least 24 to 48 hours after pressure washing before applying any paint or primer.
Step 3: Scraping and Removing Old Peeling Paint
Any paint that's already failing needs to come off. Painting over peeling or flaking paint is one of the most common mistakes homeowners make. The new paint will simply adhere to the old failing layer, and it will peel right along with it.
Use a paint scraper to remove loose or peeling areas. On exterior surfaces with significant paint failure, a heat gun or infrared paint remover can soften stubborn layers so they lift off cleanly. Work at a low angle, keep the tool moving, and never gouge the surface underneath.
One important note for older homes: houses built before 1978 may contain lead paint. If your home falls in that range, stop and get it tested before you start scraping or sanding. Disturbing lead paint without proper containment is a health risk, and licensed painters are trained to handle it safely.
Once scraping is done, feather the edges. That means sanding the transition between the bare surface and the remaining paint so you don't see a hard ridge through your new finish.
Step 4: Sanding for Adhesion
Sanding does two jobs. It smooths out rough spots and it dulls glossy surfaces so paint has something to grip.
Use 120 to 150 grit sandpaper for most interior walls. For trim, doors, and cabinets that already have a semi-gloss or gloss finish, a light scuff sand is essential. Skip it and your new coat will scratch off with a fingernail.
Vacuum the dust, then wipe everything down with a damp cloth or tack cloth. Sanding dust left on the wall acts like a barrier between the paint and the surface.
Step 5: Repairing Holes, Cracks, and Damage
This is where a wall goes from "painted" to "professionally finished."
Small nail holes get filled with spackle. Larger holes need a patch, mesh tape, and joint compound applied in thin layers. Hairline cracks should be opened up slightly with a utility knife before filling so the compound has room to hold.
On the Gulf Coast, watch for two specific issues. Stucco hairline cracking is extremely common in Navarre, Gulf Breeze, and Santa Rosa Beach because of the constant expansion and contraction from heat. And any soft or crumbling drywall usually points to a moisture problem behind the wall that needs fixing before you paint over it.
Let all patches cure fully, sand them flat, and prime the repaired spots. Fresh joint compound absorbs paint at a different rate than the surrounding wall, so unprimed patches will show through as dull spots. Painters call this flashing, and it is one of the clearest signs a job was rushed.
Step 6: Caulking Gaps and Seams
Caulk seals the gaps where different materials meet. Around window frames, door casings, baseboards, trim, and siding joints.
On exteriors, this step does more than look good. It keeps water out. In a climate with wind-driven rain and daily humidity swings, open seams are how moisture gets behind your paint and starts the peeling cycle all over again.
Use a quality paintable acrylic latex caulk with silicone for most applications. Cut the tip small, run a steady bead, and tool it smooth with a wet finger or caulk tool. Let it cure according to the label before painting over it.
Step 7: Treating Mold and Mildew
Anything dark and splotchy on your walls needs to be identified before you cover it. Mildew will grow right through new paint if it isn't killed first.
Clean affected areas with a mildewcide or a diluted bleach solution, rinse thoroughly, and let the surface dry completely. If the growth keeps coming back, you have a moisture source that needs to be found and corrected. Painting over it only hides the problem for a few months.
This is one of the most common issues we run into on homes in Fort Walton Beach, Mary Esther, and Panama City Beach, especially on shaded north-facing walls that stay damp.
Step 8: Priming
Primer is not an optional upsell. It is what makes paint stick and stay uniform.
You need primer when you are covering bare drywall, wood, or masonry, painting over patches and repairs, going from dark to light colors, blocking stains from water, smoke, or tannin bleed, or painting over glossy surfaces.
Match the primer to the problem. A stain-blocking primer handles water rings and rust. A bonding primer works on slick surfaces like tile, laminate, or previously glossed trim. A masonry primer is built for stucco and block. Our Sherwin-Williams rep, Caleb, will often come out and test the surface with us on tricky exteriors so we know exactly what the substrate needs before we commit to a system.
Step 9: Protecting Everything Else
Prep isn't only about the walls. Furniture gets moved and covered. Floors get dropped. Fixtures, outlets, and switch plates come off. Landscaping gets tarped on exterior jobs.
Tape lines should be pressed down firmly along the edge so paint cannot bleed underneath. A quick pass with a putty knife along the tape edge makes a noticeable difference in how sharp your lines look.
Step 10: Checking Moisture Before You Paint
This is the step almost every DIY project skips, and it matters more here than almost anywhere else in the country.
Painting a damp surface traps moisture underneath. That trapped moisture becomes blistering, bubbling, and peeling within months. Professional painters use a moisture meter on exterior siding, stucco, and wood before starting. Most exterior coatings want a moisture reading below roughly 15 percent.
If it rained yesterday, your walls may look dry and still not be ready. Give it time.
How Long Should Prep Actually Take?
Homeowners are often surprised by this. On a typical exterior repaint along the Emerald Coast, prep work can account for 50 to 70 percent of total project time. Painting itself is the fast part.
Here is a rough sense of what to expect:
- Interior room, good condition: a few hours of prep
- Interior with repairs and multiple patches: one full day or more
- Exterior, average home: two to four days including wash, dry time, scraping, caulking, and priming
- Exterior with heavy paint failure or wood rot: a week or more
If a painter quotes you a full exterior repaint and plans to start spraying the next morning, ask what their prep process looks like. A fast start is not a good sign.
Common Prep Mistakes That Cost Homeowners Money
- Painting over dirty or salt-covered exterior surfaces
- Skipping primer on patches and repairs
- Painting too soon after pressure washing
- Ignoring mildew instead of treating it
- Failing to scuff sand glossy trim
- Using cheap caulk that cracks within a year
- Painting in direct afternoon sun or above 90 percent humidity
- Not addressing the moisture source behind a stain
Every one of these leads to the same outcome. You pay twice.
Should You Prep It Yourself or Hire a Pro?
DIY makes sense for a single interior room in decent shape. A bedroom with a few nail holes and no moisture issues is a very reasonable weekend project.
Hiring a professional makes more sense when you are dealing with exterior work, two-story access, existing paint failure, stucco cracking, mold, homes built before 1978, or anything where you are not sure what you are looking at. The prep is where the skill actually lives, and it is also where mistakes are hardest to undo.
At Emerald Coast Painters, prep is built into every quote we write. We do not treat it as an extra line item because it is not optional. Pressure washing, scraping, sanding, patching, caulking, and priming are part of the job from Pensacola to 30A, including Navarre, Gulf Breeze, Destin, Santa Rosa Beach, Inlet Beach, and Panama City Beach.
Ready to Get Started?
Whether your walls need a light refresh or a full restoration, the finish you get depends on the foundation underneath it. If you want the job done right the first time, we would love to take a look.
Schedule your free estimate at www.bookecp.com and let's talk about what your home actually needs.